Composting at Home: A Beginner's Guide to Turning Kitchen Scraps Into Garden Gold
Composting sounds intimidating until you actually start. This is the honest, no-nonsense guide I wish I'd had — what really matters, what doesn't, and how to end up with rich dark compost instead of a smelly pile of regret.
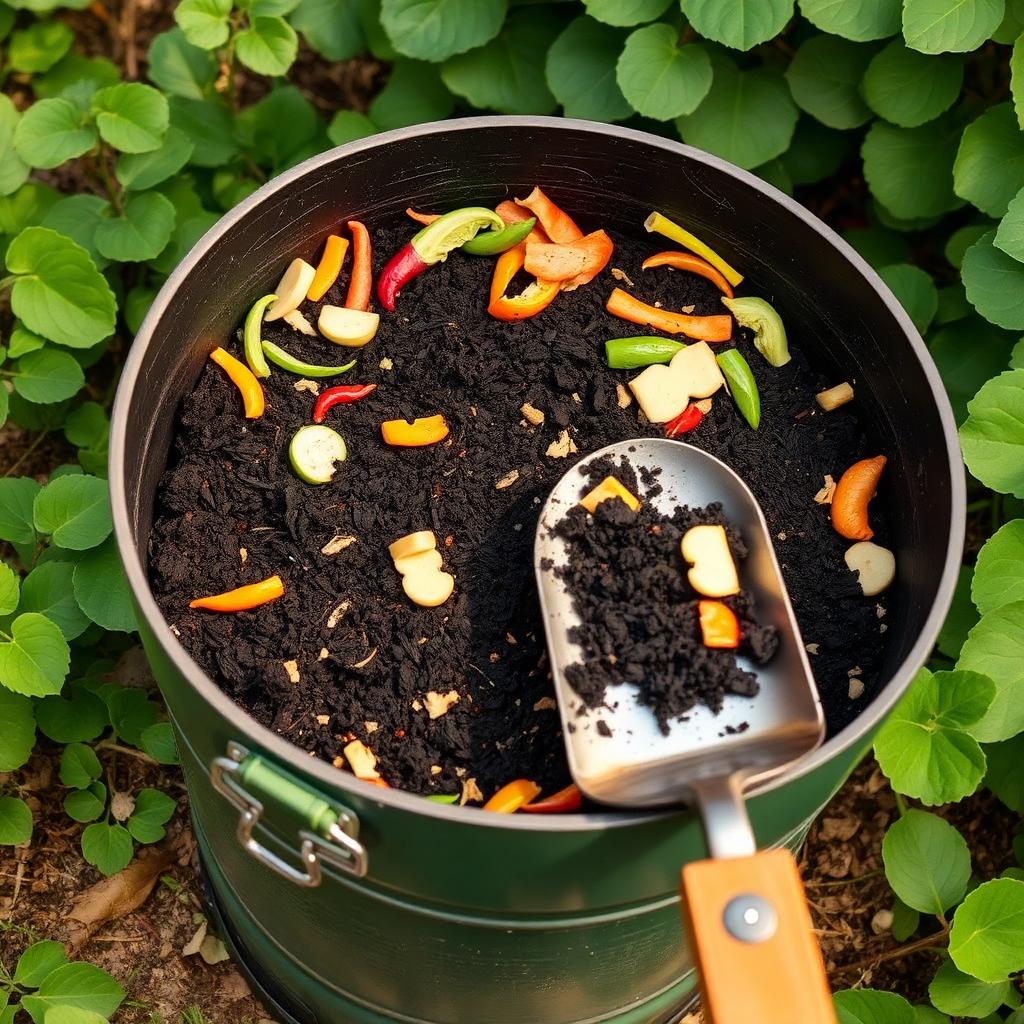
My first compost pile was a disaster. I read three articles, bought a spinning drum bin, tossed in a week's worth of banana peels and coffee grounds, and waited. Three months later I had a slimy, fruit-fly-infested bucket of goo that smelled like a garbage truck in July. I almost gave up on the whole idea. The problem wasn't composting — it was that everyone had described it in vague, romantic terms without explaining the two or three details that make or break a pile.
Eighteen years and roughly a thousand cubic yards of finished compost later, I've learned that home composting is genuinely simple once someone tells you the truth. You don't need a fancy bin, you don't need a thermometer, and you don't need to think about carbon-to-nitrogen ratios like a chemistry student. You need to understand a handful of principles, pick a system that fits your life, and give it a few months. This guide is what I tell everyone who asks how to start.
Why compost at all
Roughly a third of what the average American household throws away is compostable — food scraps and yard waste that could feed a garden instead of taking up space in a landfill. In a landfill, that same material breaks down without oxygen and produces methane, a greenhouse gas about 25 times more potent than carbon dioxide. In a compost pile, it breaks down with oxygen and produces carbon dioxide, water and beautiful crumbly soil amendment. Same material, radically different environmental outcome.
For your garden, finished compost does things no bagged fertilizer can. It improves soil structure so heavy clay drains better and sandy soil holds moisture longer. It feeds the microbial life in the soil that makes nutrients available to plants. It buffers pH. And it's free — if you were composting anyway, you'd be paying for the bag of soil amendment you no longer have to buy.
There's also the quiet satisfaction of closing a loop in your own kitchen. Onion skins from Sunday's roast come back a year later as the soil that grows next year's tomatoes. It's not going to save the planet by itself, but it makes the kitchen feel connected to the garden in a way that stays with you.
The only rule that actually matters
Compost piles need three things: green material (nitrogen), brown material (carbon), and air. Get those roughly right and the pile will work. Get them wrong and the pile will smell, stall, or attract pests.
Greens are wet, fresh, high-nitrogen materials: fruit and vegetable scraps, coffee grounds, tea bags, fresh grass clippings, garden trimmings, plant-based leftovers. Browns are dry, brown, high-carbon materials: dry leaves, straw, shredded cardboard, paper egg cartons, small wood chips, sawdust from untreated wood. The rough rule that works for most home piles is two to three parts brown to one part green by volume — meaning every scoop of kitchen scraps needs two or three scoops of brown material on top.
This is the single most common mistake beginners make. They add greens (kitchen scraps) constantly and never add browns, because kitchen scraps are what they generate day to day. The pile turns into a wet, dense, oxygen-starved mat that smells terrible. Keep a bag or bin of dry leaves or shredded cardboard next to your compost, and every time you dump scraps, throw a couple of handfuls of browns on top. That single habit prevents 80 percent of compost problems.
What to compost and what to skip
Safe to compost: fruit and vegetable scraps, coffee grounds and paper filters, tea bags (check that they're plastic-free), eggshells, stale bread, plain cooked grains, plant trimmings, dry leaves, grass clippings, straw, shredded uncoated paper, cardboard, sawdust from untreated wood, small twigs, and dryer lint from natural-fiber laundry.
Skip in a backyard pile: meat, fish, bones, dairy, oily foods, cooked leftovers with sauce or dressing, pet waste from cats and dogs, glossy or coated paper, treated or painted wood, diseased plants, and weeds that have gone to seed. These can compost, but they attract pests, produce serious odors, or introduce problems (parasites, seeds, pathogens) that home piles don't get hot enough to reliably kill.
Two gray areas: citrus peels and onion skins are fine in moderation but slow to break down; chop them up if you add a lot. Bread and grains are fine in a well-managed hot pile but rodent bait in a cold pile — skip them if you have any concern about mice.
Picking a bin: what really matters
There are four main options for a home composter, and each fits a different situation. Understanding your space and habits matters more than which brand you buy.
An open pile or wire bin (3-by-3-by-3 feet or larger) is the workhorse for anyone with a backyard. It's cheap, easy to turn with a fork, and works well for yard-heavy composting where volume matters more than speed. Downside: it's ugly and can attract critters if you're careless.
A closed plastic bin (Earth Machine, geobin, and similar) is the good middle ground for suburban yards. It looks tidier, keeps most rain out, discourages pests, and holds enough volume to actually cook. The trade-off is that turning is awkward — you generally have to lift the bin off or use an aerating tool.
A tumbler is what most beginners buy first. It's compact, tidy, easy to turn, and rodent-proof. It's also small — most tumblers are 30 to 60 gallons — so you have to be disciplined about the greens-to-browns ratio or you run out of room and end up with a wet mess. Best for households that generate modest scraps and don't have much yard waste.
Worm bins (vermicomposting) are the right choice for apartment dwellers or anyone without outdoor space. Red wigglers happily eat kitchen scraps in a stacked plastic bin under the kitchen sink or on a balcony, and produce a small quantity of extremely rich vermicompost. It's a slightly different craft with its own rules, but it works remarkably well indoors when you match the worm population to the scrap volume.
Setting up a working pile in a weekend
Pick a partly shaded spot with reasonable drainage. Full sun dries the pile out too fast; deep shade keeps it cold. Level ground beats a slope, and being close enough to the kitchen door that you'll actually walk out with scraps in January matters more than aesthetics. A 20-foot detour to the far corner of the yard means the coffee grounds stay in the sink.
Start with a base layer of brown material — a few inches of dry leaves, small twigs or straw — for drainage and airflow. Then alternate green and brown layers as you have material, always ending with a brown layer on top. That top layer is what keeps odors down and fruit flies away.
Water lightly as you build if the material is dry. A working compost pile should feel like a wrung-out sponge — moist to the touch but not dripping when you squeeze a handful. Too dry and nothing decomposes; too wet and it goes anaerobic and smells.
Turning, timing and how to know it's working
Turning the pile mixes fresh material with older material and reintroduces oxygen, which speeds decomposition dramatically. A weekly turn with a garden fork is enough in most home setups. If that sounds like too much work, a monthly turn will still produce compost, just more slowly — six to nine months instead of two to three.
A working hot compost pile will warm up noticeably in the middle within a few days of building. If you slide your hand into the center after a week and it feels warmer than the air, the microbes are doing their job. A really active pile can hit 130 to 150°F, which is hot enough to kill many weed seeds and pathogens. Most home piles run cooler than that and take longer, and that's completely fine.
You'll know compost is finished when the original ingredients are no longer recognizable — it should look like dark, crumbly forest soil, smell earthy and sweet, and cool to the touch. There will almost always be a few stubborn bits (avocado pits, corn cobs, eggshells) that never fully break down. Sift them out and toss them back in the next pile.
Troubleshooting: fixing a smelly, slow or gross pile
Smells like ammonia or rotten eggs: too many greens, not enough oxygen. Mix in a large volume of dry browns — leaves, shredded cardboard, straw — and turn the pile hard to fluff it up. It will improve within days.
Not breaking down at all: usually too dry or too small. Water it until it feels like a wrung-out sponge, and add more material if the pile is under about three cubic feet. Small piles simply can't hold enough heat to cook well.
Fruit flies everywhere: kitchen scraps sitting exposed on top of the pile. Bury every scrap addition under at least two inches of browns and the fruit flies vanish within a week.
Rodent visits: an open pile with meat, dairy, oily food, or a lot of exposed bread. Switch to a closed bin, remove the offending materials, and don't compost cooked food outdoors again.
Slimy and matted grass clippings: fresh grass clumps together into an anaerobic mat. Let clippings dry for a day on the driveway, or mix them with an equal volume of dry leaves before adding to the pile.
Using finished compost in the garden
Finished compost is a soil amendment, not a fertilizer. Its power is what it does to soil structure and microbial life over time, not the punch of nutrients it delivers. That said, it does add slow-release nitrogen, phosphorus, potassium and a broad range of micronutrients — enough that many well-composted gardens rarely need commercial fertilizer.
The best all-purpose use is topdressing: spread a half-inch to one-inch layer of compost over garden beds in early spring and again in fall, and let earthworms and rain incorporate it into the soil. For new beds or containers, mix compost into the top six inches of soil at roughly 20 to 30 percent by volume.
Compost tea — steeping finished compost in water for a day or two and using the liquid to water plants — is popular but often overhyped. It's fine if you enjoy the process; skip it if it feels like a chore. The plain solid compost does the important work.
Composting in an apartment or a small yard
Vermicomposting is the standout apartment option. A small stacked plastic worm bin fits under a kitchen sink or in a closet, produces almost no smell when balanced correctly, and turns a household's fruit and vegetable scraps into small quantities of extraordinarily good compost for houseplants and container gardens. Start with one pound of red wiggler worms and expect to process about half a pound of scraps per pound of worms per day once the population is established.
Bokashi is another good indoor option — a fermentation system that pickles kitchen scraps in a bucket with an inoculated bran. It doesn't produce finished compost by itself; the fermented output needs to be buried in soil or added to an outdoor pile to finish. But it can handle meat and dairy that traditional composting can't, and it fits under a sink.
For a small yard, a single 40-gallon closed bin plus a five-gallon countertop scrap pail with a charcoal filter is usually enough for a two- to four-person household. Empty the pail every three or four days, top with browns, and you'll produce two to three cubic feet of finished compost per year — enough to topdress a couple of raised beds.
Winter composting and year-round habits
Composting slows dramatically in cold weather but doesn't stop. Piles keep accepting material through winter; they simply don't decompose much until spring warms them back up. A well-insulated pile (piled high, covered with a thick layer of leaves or a tarp) can even stay warm in the center through moderate winters.
The two habits that make year-round composting sustainable are keeping a decent countertop scrap container and stockpiling browns in fall. Every October, bag up leaves from your yard (or your neighbors' curbside) and store them next to the compost bin. That stockpile is what lets you keep the greens-to-browns ratio right through the winter and spring, when nature isn't dropping browns for you.
In summer, the reverse problem: you have unlimited grass clippings and green trimmings but browns are scarce. Save shredded cardboard, paper bags and newspaper year-round for these months. A stash of dry material is what turns a chaotic composting practice into a calm one.
Expert tips
- •Keep a small lidded container on the kitchen counter for scraps. A stainless bin with a charcoal filter costs $25 and completely removes the smell.
- •Chop scraps into pieces smaller than a golf ball before adding them. Smaller pieces decompose two to three times faster.
- •Save the coffee grounds bag from your local café. Most give away used grounds for free, and they're gold for a compost pile.
- •Shred cardboard with a cheap paper shredder before adding it. Whole cardboard sheets take a year to break down; shredded takes a month.
- •If your compost is ready but you're not ready to use it, cover it with a tarp to protect it from rain. Rain leaches nutrients out of finished compost.
Common mistakes to avoid
- ✕Only adding kitchen scraps. Without browns, the pile turns into a wet anaerobic mat within weeks.
- ✕Composting in a bin that's too small. Anything under about a cubic yard struggles to hold enough heat to cook properly.
- ✕Adding meat, cheese and oily food to an outdoor pile. It attracts every raccoon in a mile radius.
- ✕Turning too much or too little. Weekly is plenty; daily is unnecessary and monthly is fine if you're patient.
- ✕Giving up after one bad batch. Every gardener's first pile has problems. The second one always goes better.
Frequently asked questions
Sources & further reading
- USDA National Institute of Food and Agriculture — Home Composting — USDA
- Cornell Waste Management Institute composting fact sheets — Cornell University
- EPA Sustainable Management of Food — Composting at Home — U.S. EPA
Editor's note: Elena has been running home compost systems in three different climates over eighteen years — the troubleshooting advice above comes from piles she's personally fixed.
Master Gardener and former nursery manager. Writes about backyard vegetable beds, native plantings and low-impact home habits.
More in Sustainable Living
Energy Saving Tips for Homeowners That Actually Move the Needle
Energy saving tips ranked by real impact — the moves that noticeably cut bills, and the ones that barely register.
Related topics
Ideas from nearby corners of the site you'll probably like too.
Beginner Gardening Guide: Start Small and Keep It Alive
The plants that forgive first-timers, the tools that actually matter, and the mistakes worth skipping in your first growing season.

Smart Home Devices Worth Buying in 2026
An honest list of smart home devices that earn their spot, and the ones that get unplugged after six months.
A Natural Cleaning Routine That Actually Works
A gentler cleaning routine that actually cleans — and honest notes on where natural products fall short.