Building a Raised Garden Bed: A Weekend Project That Lasts a Decade
A step-by-step raised bed plan that keeps its shape for years, drains properly and grows vegetables that outperform anything from a store-bought kit.

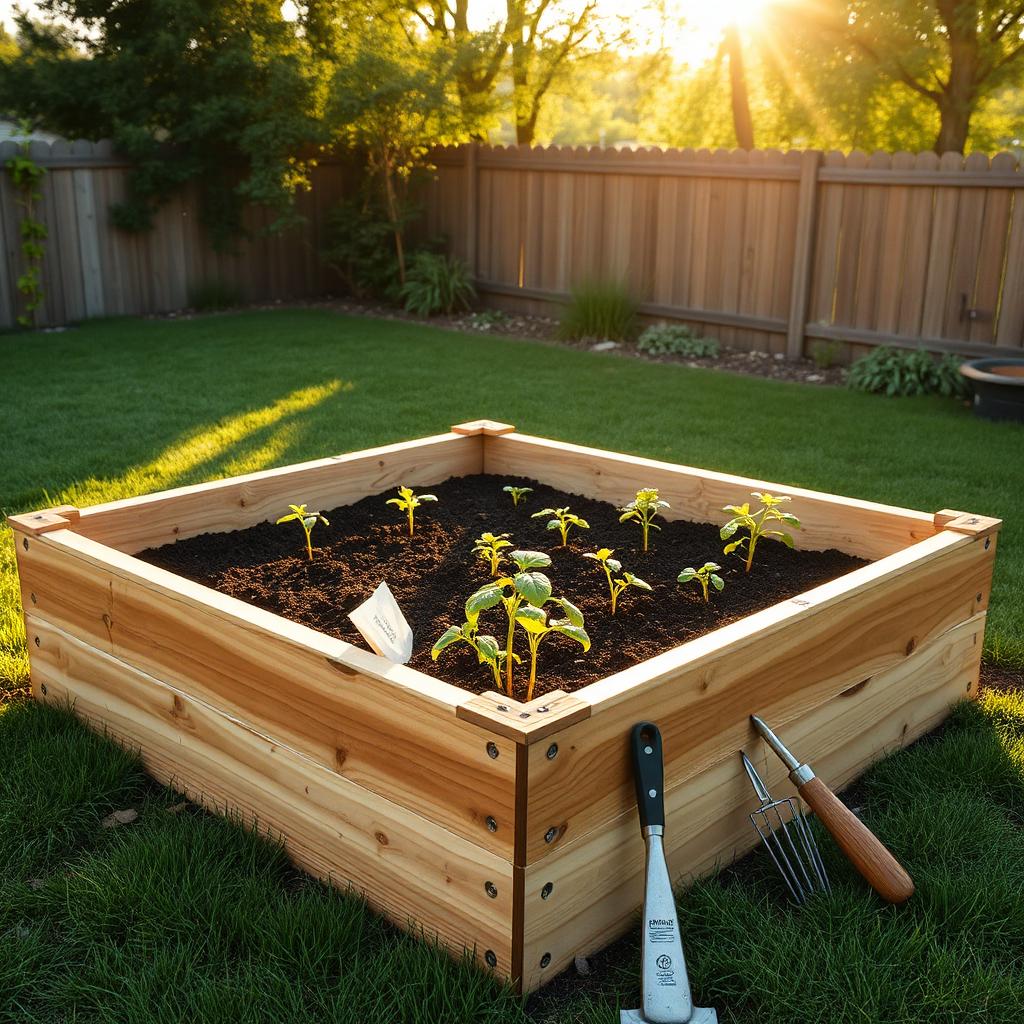
I built my first raised bed out of scavenged fence pickets and it collapsed after one wet spring. I built my second out of the wrong wood and it rotted in three seasons. The one currently in my backyard is going into its tenth year and still looks straight, because I finally learned the handful of details that separate a bed that lasts a decade from one that lasts a summer.
This is not a fancy build. It's four boards, eight screws per corner and a soil mix worth taking seriously. Done in a Saturday, it will outlive most of the tools you use to build it.
Size it for reach, not for ambition
The single most common mistake new gardeners make is building a bed too wide. If you can only reach it from one side (against a fence), keep it under three feet wide. If you can walk around both sides, four feet is the maximum. Any wider and you'll end up stepping into the bed to weed, compacting soil that took you a season to build up.
Length is flexible — eight feet is the sweet spot for a single bed because standard lumber comes in that length and you have no waste. Depth should be at least ten to twelve inches for most vegetables; sixteen to eighteen inches if you want to grow carrots, potatoes or long-taproot herbs.
Wood: cedar is worth the price
For a bed you want to last, use rough-sawn cedar or redwood. Both resist rot naturally, weather to a soft silver-gray and are safe for growing food. Pressure-treated lumber sold today is treated with copper-based preservatives (ACQ or MCA), which most agricultural extension offices consider safe for vegetable beds, but I still don't use it — cedar looks better and lasts as long. Never use old railroad ties, telephone poles or CCA-treated wood from before 2003; those contain arsenic and creosote.
Skip 1-by lumber; it warps and splits within a couple of seasons. Use 2-by-10 or 2-by-12 boards. For an eight-by-four bed at 10-inch depth, you'll need three 8-foot 2x10s (two long sides plus cut two short ends from the third).
Corner joinery: the detail that keeps it square
The corners are what fail first. A bed simply screwed together at the corners will bow outward from soil pressure and water expansion within two years. The fix is a 4x4 corner post, eight to twelve inches taller than the bed depth, screwed into from both directions with exterior-grade structural screws (GRK RSS or equivalent) — three per side.
The extra length of the corner post gets driven or set into the ground, anchoring the whole bed. This one detail is what has kept my bed square for ten years while my neighbor's identical kit bed developed a visible belly by year three.
Location and site prep
Vegetable beds need at least six hours of direct sun; eight is better. Watch a candidate spot for a full day before you commit — a place that looks sunny at noon may be shaded from three onward by a neighbor's tree you've never noticed. Orient the long side east-to-west so taller plants at the north end don't shade shorter plants.
Clear the site of grass and weeds. You do not need to dig — lay a double layer of cardboard directly on the grass under where the bed will sit, then set the bed on top. The cardboard smothers the grass, breaks down in a season, and earthworms will thank you. Skip landscape fabric; it clogs, shreds and interferes with drainage.
Assembly, step by step
Cut two short-end boards to 45 inches (giving you an interior width of 45 inches, close to but under 4 feet after wall thickness). Cut four 4x4 posts to your bed depth plus 8 inches (so 18 inches for a 10-inch-deep bed). Pre-drill every screw hole; cedar splits easily and 2x10s crack at the ends if you drive fasteners cold.
On a flat surface, screw one long side to two corner posts, then the other long side to the other two posts. Stand the two long assemblies up and connect them with the short ends. Check for square by measuring diagonally corner to corner — the two measurements should be within a quarter inch. Adjust and drive the last screws.
Move the assembled frame to your site, set it on the cardboard, and drive or set the corner posts into the ground so the bed sits flush. Level the top edges front-to-back and side-to-side with a torpedo level; shim under low corners with flat stones if needed.
The soil mix that outperforms bagged garden soil
Do not fill a raised bed with bagged 'garden soil.' It compacts within a season and grows disappointing vegetables. The mix that works, sometimes called Mel's Mix or a version of it: one part high-quality compost, one part peat moss or coconut coir, and one part coarse vermiculite or perlite. Buy in bulk from a landscape supply if possible — a 4x8x10 bed needs about a cubic yard of finished mix, which costs a fraction of the bagged equivalent.
If you can't source those ingredients, buy the highest-quality bagged raised-bed mix your garden center sells (not 'garden soil,' not 'topsoil'), and amend it with an additional 25 percent by volume of finished compost. Top-dress with compost every spring; the bed's soil level will drop an inch or two per year as organic matter breaks down, which is normal.
First-year planting: keep it simple
Resist the urge to plant every vegetable you like the first year. New raised beds do best with a small number of easy crops: bush beans, salad greens, chard, radishes, and one variety of tomato. All of these produce reliably in a first-year bed and give you a season to learn how your soil dries, how much water it needs and where the sun actually falls.
Skip corn (too tall, poor pollination in a small bed) and skip melons and pumpkins (they'll sprawl over the sides and take over). Save those for year three when you know your site.
Watering, mulching and long-term care
Raised beds drain faster than in-ground beds — that's a feature, but it means they need more water. In summer, expect to water every other day; in a heat wave, daily. Drip irrigation on a battery-powered timer costs about forty dollars and pays for itself in one saved vacation.
Mulch heavily with straw or shredded leaves — two to three inches — as soon as your seedlings are established. Mulch keeps soil temperature even, cuts watering in half and suppresses weeds. Refresh once a summer and turn last year's remnants into the soil in fall.
Expert tips
- •Line the inside of the bed walls with a strip of heavy plastic before filling. It doubles the life of the wood by keeping wet soil off the boards without affecting drainage from the bottom.
- •Add a handful of worm castings to each planting hole for transplants. It's the single cheapest input with the biggest first-year visible effect.
- •Take a photo of the bed each month in the first year. You'll learn more about sun patterns and plant spacing from those photos than from any garden book.
Common mistakes to avoid
- ✕Building the bed wider than four feet. You will step into it to weed, compact the soil and undo the reason you built a raised bed.
- ✕Filling with bagged 'topsoil' or 'garden soil.' Both compact into concrete within a season.
- ✕Skipping the corner posts. Screw-only corners bow outward and eventually split.
Frequently asked questions
Sources & further reading
- Cornell Cooperative Extension raised-bed gardening guide — Cornell University
- Oregon State Extension: Building Your Raised Bed Garden — Oregon State University
- USDA Natural Resources Conservation Service soil health resources — USDA NRCS
Editor's note: Elena is a certified Master Gardener who has built and maintained raised beds in three different climates. The dimensions, wood choice and soil mix here reflect what she uses in her own garden.
Master Gardener and former nursery manager. Writes about backyard vegetable beds, native plantings and low-impact home habits.
More in Gardening & Outdoor Living
Beginner Gardening Guide: Start Small and Keep It Alive
The plants that forgive first-timers, the tools that actually matter, and the mistakes worth skipping in your first growing season.
Outdoor Kitchen Design Ideas: A Contractor's Practical Guide
A contractor's take on outdoor kitchens: how to lay one out around real cooking, which materials survive winter, and the utility decisions people wish they'd made before pouring the slab.
Outdoor Patio Design Ideas You'll Actually Use All Summer
Patio ideas built around real use — shade, seating and lighting choices that keep you outside past week one.
Related topics
Ideas from nearby corners of the site you'll probably like too.
Bathroom Remodeling Ideas That Look Great and Age Well
Bathroom remodeling ideas that still look right ten years in — from layout to finish choices, without the trend regrets.
Composting at Home: A Beginner's Guide to Turning Kitchen Scraps Into Garden Gold
Composting sounds intimidating until you actually start. This is the honest, no-nonsense guide I wish I'd had — what really matters, what doesn't, and how to end up with rich dark compost instead of a smelly pile of regret.
Best Indoor Plants for Air Quality (and How to Not Kill Them)
Honest picks for indoor plants that clean the air, add real warmth to a room, and forgive a beginner's care routine.